Backpacking with a hammock provides a unique and comfortable rest in the wilderness. As hammock camping gains popularity, it’s crucial to know the essential gear for a safe and enjoyable trip. This article covers the key equipment you’ll need, including the right hammock, protection from the elements, and a variety of accessories for convenience. Use this gear list as a starting point for your research in selecting hammock gear for a good night’s sleep on your next backpacking trip.

Camping Hammock with Attached Bug Net
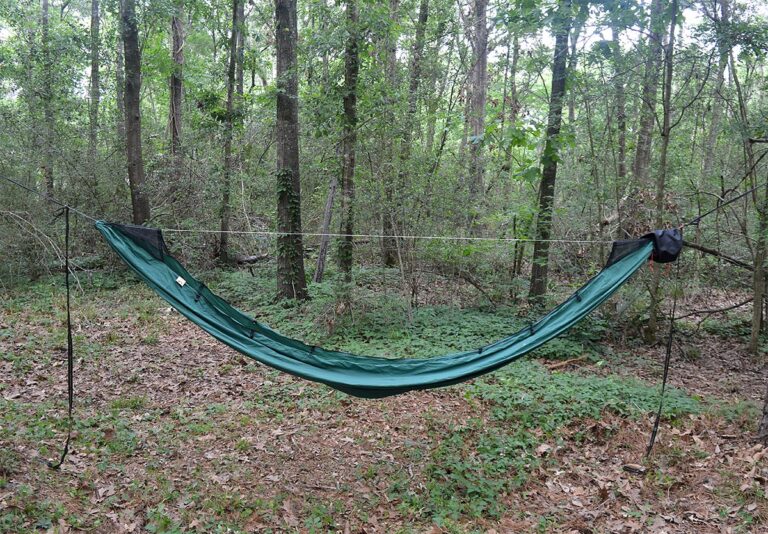
While you can use many types of hammocks for camping, I recommend buying a dedicated camping hammock for backpacking. Comfort and weight savings are the main advantages to hammocks designed for backpacking. The best camping hammocks are typically 11 ft or longer, which makes them more comfortable and roomy.
Designs with built-in bug nets are easier to set up also save weight. This is because the mosquito net attaches to the sides of the hammock and there is no extra netting below the hammock. You don’t need to worry about installing a separate bug net over the hammock or underquilt.
In addition, that extra mesh is surprisingly heavy. For example, my Guardian bug net by Eno weighs about 1 lb alone, while my Chameleon hammock with integrated netting weighs 1 lb. The Chameleon is my favorite camping hammock because it’s a lightweight backpacking hammock which also works well for car camping.
Gathered End vs Bridge Hammock
There are two types of hammocks commonly used for hammock camping. The most common are gathered end hammocks which are the popular hammocks you see in campgrounds everywhere. Outdoor enthusiasts enjoy these on any type of camping trip. They taper together on each end where all the fabric is gathered and connected with a loop which connects to your suspension straps.
Bridge hammocks use spreader bars on each end to widen the hammock. The biggest advantage of this style is more comfort – you can truly sleep flat and in different positions. Gathered end hammocks are lighter weight than bridge hammocks making them a good idea for backpacking. They also pack smaller and take up less space in your pack.
Hammock Suspension
When you purchase a quality camping hammock, the hammock straps or suspension system is often sold separately. The suspension options quickly become confusing. The main tradeoffs are ease of setup, weight, and length flexibility (which allows you to use trees at different distances). Also be sure to check that the suspension rating will support your body weight.
For backpacking, look for lightweight options. A good compromise between weight and ease of use (no knots required) are tree straps with a titanium buckle to connect the strap to the hammock. Whoopie slings are a lightweight and convenient option (beware that they limit the spacing between trees you can use).

Hammock Tarp
A tarp over your hammock is necessary if you want to stay dry in unexpected wet weather. Tarps are the hammock equivalent of a rain fly on a tent. A tarp also provides protection from cold winds and gives you some privacy.
While you can use a standard rectangular tarp, hammock tarps are usually diamond or hexagon shaped to provide optimum coverage and connection points exactly where you need them. They also save weight by literally cutting corners off!
Tarp sizes vary dramatically – from just barely enough coverage to large tarps which reach the ground and fold into doors on the end. Coverage, weight, and cost are the main considerations for backpacking. My preference is for a medium amount of coverage with a lightweight material. I believe this is a good starting point if you are new to hammock camping. Warbonnet Outdoors has a variety of tarp sizes and materials which provide better coverage than most hammock tarps.
Hammock Tarp Lines
The higher quality hammock tarps do not include any kind of lines to hang or tension the tarp so you need to purchase these separately. I use and recommend reflective lines to reduce tripping over your lines in the dark. I won’t tell you how many times I’ve tripped over lines while camping!

Stakes
You will need stakes to connect the lines of your tarp to the ground and hold it away from your hammock. You might be able to set up a tent without stakes, but they are almost mandatory for hammock tarps.
Any type of tent stakes will work, just be mindful of where you will be. In areas with hard or rocky ground, short strong stakes need to survive beating into the ground with a rock or tool. For soft sandy ground, look for longer stakes which will won’t pull out as easily.

Insulation – Underquilt or Sleeping Pad
Insulation beneath your body is a unique aspect of hammock camping. Airflow under you will chill you even in slightly cool weather. I find that sitting in a nylon hammock is much cooler than my causal hammock made of cotton string. So unless you are camping in warm weather where the nightly lows are in the mid 70’s, I recommend some kind of insulation under your hammock.
Hammock Underquilts
Underquilts are the best solution here – they hang under the hammock and wrap up around the sides to insulate your body heat from the cold air. They move with you and it doesn’t matter what position you sleep in. If you want to lay diagonally in the hammock to sleep flatter, you can easily adjust the quilt by pulling one side up.

Underquilts have either down or synthetic insulation. Both are equally warm, but high quality down is lighter and packs down smaller in your backpack. Down underquilts are also much more expensive than synthetic.
Underquilt Alternatives
When I first started hammock camping, I didn’t want to buy an expensive underquilt when I have perfectly good insulated sleeping pad. So I tried putting it in the hammock to sleep on instead. It worked as long as I lay straight in the hammock. As soon as I tried to lay on the diagonal, the pad starts to twist and slip out to one side (usually leaving my feet and lower legs cold).
Some manufacturers like Kammok now have insulated pads designed specifically for hammocks, but I’ve never tried these.
Another option is a double layer hammock where you can slide the pad between the two layers to help hold it in place. Dutchware offers this option on their Chameleon hammocks (this increases the cost and weight). You can also try placing a warm sleeping bag between the hammock layers.
Top Quilt or Sleeping Bag
Like sleeping in a tent or at home, you need some kind of insulation to cover you. Top quilts and sleeping bags are the popular solutions for hammock camping.
I started hammock camping with a sleeping bag. The main advantage of sleeping bags is that they are warmer. However, sleeping bags are also confining and difficult to get in and out of in a hammock.
I eventually moved to a top quilt. These are basically insulated blankets which you can wrap around yourself. Mine includes a zippered foot box to help keep my feet warmer in cold weather. Top quilts are lighter because they don’t use as much fabric. They also do not provide any coverage over your head, so you may want to sleep with a hat or quilted bonnet in cold weather.
Optional Gear
The gear above is pretty much essential unless you are sleeping in very warm weather or you are on a short trip where you don’t need to worry about rain. There are several other small items you may want to consider to customize your hammock camping gear for your needs. These include organizers, tools for easy setup and packing, or extra protection in the elements.
Ridgeline Organizer
A ridgeline organizer is a fabric set of pockets which hang from your hammock’s ridgeline. The organizer typically slides freely on the ridgeline so you can place it directly overhead for easy access or slide it down toward your feet to get it out of the way. I keep my phone, chapstick, and other small items in the organizer to make them easy to reach.
Side Pockets and other Organizers
Storing gear in your hammock is more challenging than a tent. Various hammock brands have different options for helping gear management, so the options vary depending on the brand. My Chamelion hammock has a side pocket I can reach from inside the hammock. Other options include storage spaces in the ends of the hammock which are out of the way.
Gear Sling
If your hammock doesn’t have internal storage areas, consider a gear sling. This is a mini-hammock which hangs under the hammock for gear. I haven’t tried one of these yet, but many are well reviewed. They might be a concern if you like hanging your hammock close to the ground. I think these would be useful for shoes or other items you don’t need in the hammock, but want to keep off the ground.
Tarp Line Hardware
Setting up your tarp can be frustrating if you struggle with knots. Line tensioners and are a great solution. Not only do they tension the line, they eliminate the need for tying any knots. There are lots of options and are often available in aluminum or titanium so they weigh next to nothing. For some reason, the manufacturers often name these after insects.
Personally I love these little gadgets, and use them on all my lines. I use them instead of a fixed ridgeline (see below) The only downside is that some designs are not intuitive to use. Be sure to watch some videos on them and then try them at home before you make camp.
Tarp Fixed Ridgeline
A fixed ridgeline is one approach to hanging a tarp. Essentially you connect a line between two trees. The tarp hangs from the ridgeline so that you can easily position it over your hammock before securing it in place and staking the tie lines. Many people swear by this method, but I prefer using my hardware which makes adjusting the tarp position easy even a support line attached on each end.
Double Ended Stuff Sack
I keep my hammock in a double ended stuff sack. This isn’t really a bag, but a fabric tube with a cinch cord on each end. I use it because it keeps my hammock completely off the ground when I set it up and take it down. The key here is to have one hammock connection loop stick out of each end of the stuff sack. You attach one end to the suspension strap while everything is still in the bag, then open the other end to pull the hammock out and attach the second end.

Tarp or Hammock Sleeve
I love using a sleeve for my hammock tarp and I have a separate article which covers snake skin sleeves in detail. These are also called snake skins because they look like a shed skin. Storing your tarp in a sleeve instead of a stuff sack makes setup easier and allows you to keep the tarp out of the way until everything else is setup.
Hooks and Carabiners
I find it useful to have some mini carabiners clipped to my hammock. You can find inexpensive aluminum ones at Walmart. I keep one on my hammock ridgeline, I use another to connect the end loops of my hammock when it’s in the stuff sack, and I have one on the side of the hammock to hang various things on the outside edge.

I also found this swivel hook/carabiner on Amazon, and I use it to hang my backpack from the end of the hammock. I use it in the opposite direction as it’s shown here – I clip the carabiner to the end of my hammock and hang my backpack from the hook. It’s easier than a simple carabiner because you don’t need to hold it open with one hand while you lift a heavy pack with the other.
I’m sure there are plenty of other accessories and goodies you can add – just be sure to stay mindful of weight and space as you consider different options. Have fun out there!