Do you love bacon? Want to turn it into an easy, delicious snack to take on your next adventure? Imagine bacon as a shelf-stable ingredient to add to your meals. Bacon jerky is the answer! It’s made by dehydrating bacon and can be flavored as sweet and spicy, black pepper, or maple syrup. Try making some delicious bacon jerky for your next trip! Check out our jerky recipe for step-by-step instructions on how to make this tasty treat in either a food dehydrator, oven, or smoker.

Bacon Jerky – Why dehydrate it?
Bacon Jerky is essentially dehydrated bacon. Drying meat into jerky is a traditional way to preserve and store it. Beef jerky is a good example probably you know and love. By removing the moisture, you’re deterring bacteria and slowing down oxidation which can cause rancidity. Food dehydrators speed the drying process with heat — which effectively kills any live organisms in the meat.
Beware of Bad Information Online
Unfortunately, I’ve seen plenty of bad information about dehydrating bacon repeated in online articles. So let’s set the record straight: It is absolutely safe to put raw meat in a food dehydrator! The USDA safe cooking guide for whole meat cuts recommends the internal temperature be at least 145°F for 3 minutes. Dehydrators can do this easily. If your dehydrator doesn’t have a temperature setting, it’s probably running at about 160°F, but you should check it to be safe.

Choose your bacon – Regular or Thick Cut?
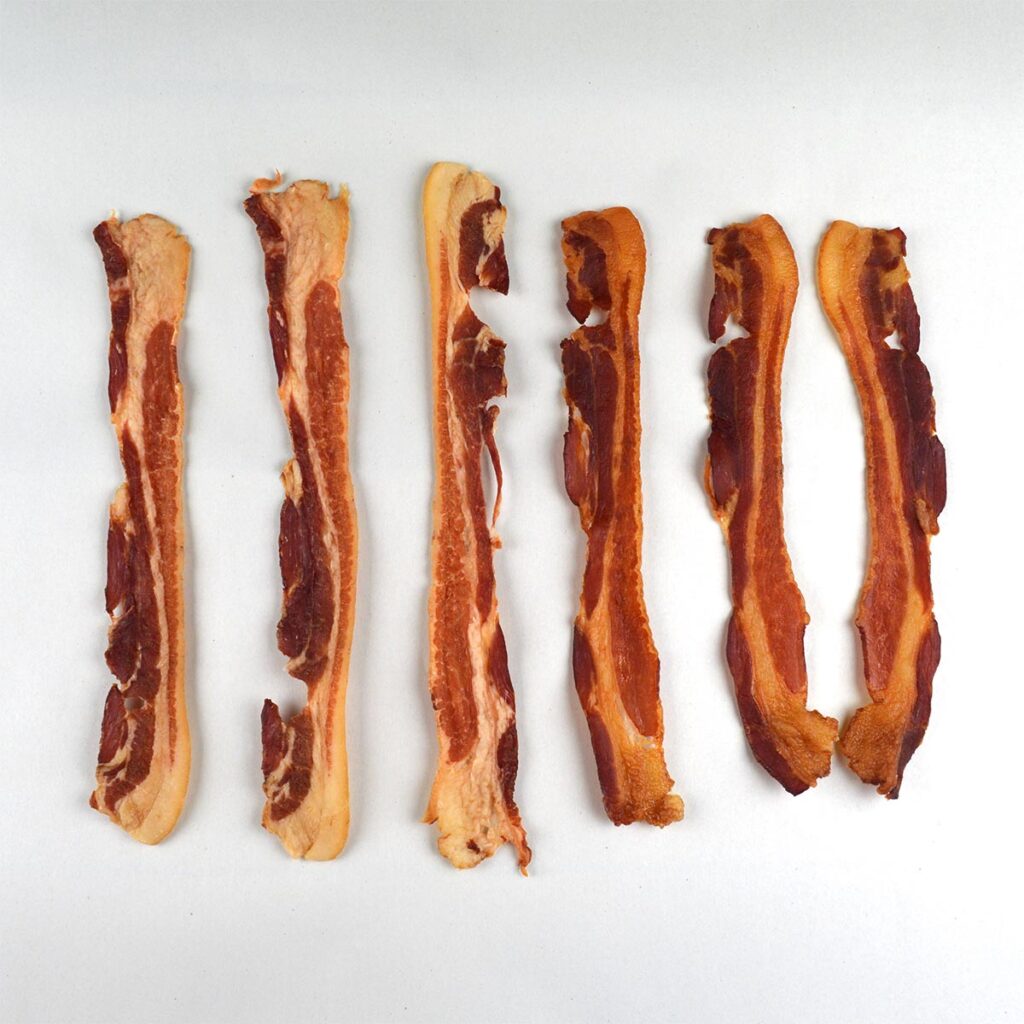
The bacon jerky recipes I’ve seen online all seem to prefer thick-cut bacon, but I’m at a loss as to why. For jerky, the regular cut is by far my favorite. It dehydrates faster, and the thinner slices make the jerky less tough and easier to eat. For this article, I’ve dehydrated some of both cuts and I provide cooking times for each.

Flavor Your Jerky – Plain or Seasoned
And now for a difficult choice… how do you want to season your bacon? They are all good, so don’t stress! It’s such a simple recipe I’m putting lots of options in this post. Here are some delicious choices:
- Plain – just pick your favorite from the store (mine is applewood smoked bacon)
- Sweet & Smoky – Marinate your bacon with water, brown sugar, liquid smoke, and a pinch of chipotle pepper. I adapted this recipe from Jerkyholic
- Maple Syrup – Brush each slice with maple syrup with a basting brush before dehydrating. This is my favorite! Just beware that it’s a little sticky when finished.
- Black Pepper – sprinkle with freshly coarse ground black pepper, and press into bacon
- Teriyaki – Use your favorite Teriyaki sauce as a marinade before dehydrating.
- Sweet and Spicy – Dry rub bacon with brown sugar, garlic powder, and little chipotle pepper
Ways to Dehydrate Bacon – Dehydrator, Oven, Smoker
You can dehydrate bacon for bacon jerky in either a food dehydrator, home oven, or smoker. The oven or smoker will be faster, but it’s easier to overcook the bacon and make it rock hard. Most oven and smoker recipes use 200°F to 225°F while dehydrators max out at 160°F. The higher temperatures tend to render or melt out more of the fat (expect more grease to drip off the bacon while cooking). This can be a plus or minus depending on your personal preference. Because of the fat loss, jerky from the oven will shrink more.
You will also notice that bacon jerky from the oven or smoker will be more browned and look “cooked”. This is especially true for the fat on thick cut bacon which stays more white and translucent. If you have a dehydrator, I encourage you to try both methods and see which you prefer. I prefer the texture from the low temperature drying in my dehydrator.
Dehydrating Instructions
Dehydrator – Place the strips of bacon on the dehydrator racks and leave a bit of space between them. They won’t shrink much, so the space helps air circulation for even cooking. To catch any excess grease that drips off, you might want to use parchment paper or a liner on the bottom empty tray.

Oven – Preheat based on temps below. Place the bacon slices on an oven-safe cooling rack over a cookie sheet or jelly roll pan (be sure it has sides to hold the grease). Line with foil for easier cleanup.
Smoker – Preheat based on temps below. Place the bacon directly on the smoker’s racks, or use the same setup as you would in an oven. For the wood chips or pellets, any of your favorite woods are fine. If you can’t decide, I like apple wood.

Cooking Temps and times
Use the following cooking temperatures and times below based on what type of bacon you use. I never bother flipping mine, but I do rotate the trays or baking sheets so they all cook evenly.
- Dehydrator – Regular Cut Bacon: 160F 4-6 hours
- Dehydrator – Thick Cut Bacon: 160F 6-8 hours
- Oven/Smoker – Regular Cut bacon: 200F 2-3 hours
- Oven/Smoker – Thick Cut Bacon: 200F 3-4 hours
Your bacon is done when the lean parts are dry and chewy. If you break the jerky in half, the lean portions will have white fibers in the meat. Unlike fruits and vegetables, your jerky will have a longer shelf life if you remove more moisture. If you plan to eat the jerky in a few days, it’s not necessary to dry it this much.
Remove the jerky from the heat source and place it on paper towels to absorb the excess fat. Use more paper towels to blot off any liquid fat. This makes the bacon less greasy to handle when it cools.

Storing Your Bacon Jerky for Best Results
One of the great things about bacon jerky is that it can be stored without refrigeration. To make it last as long as possible, you’ll want to keep it in an oxygen-free environment with no moisture or light. Here are some storage ideas and how well you can expect them to work.
- Bad: Ziploc plastic storage bag. A normal ziplock bag is NOT an airtight container. The thin plastic allows oxygen and moisture to pass through the material.
- Good: Ziploc Freezer bags. Freezer bags use thicker plastic to protect frozen food from air which causes freezer burn. While you trap some oxygen in the bag each time it’s opened and closed, no air can enter when it’s sealed.
- Better: Vacuum seal in vacuum bags (or mason jars if you are storing food at home). Vacuum sealing removes most of the air so little oxygen remains in the package.
- Best: Store in mylar bags (or mason jars) with oxygen absorbers. This method removes the most oxygen and can get as low as 0.01% in sealed containers.
Pro tip: As with most foods, cold temperatures also extend the shelf life. I recommend you vacuum seal the jerky in amounts you can eat within a few days. Then freeze or refrigerate it until you are ready to use it. This lets you make the jerkey well in advance of trips, and it will have the longest shelf life at room temperature starting when you need it.
How does Bacon Jerky go Bad?
It’s important to learn to trust your senses for food spoilage. Dried meats like jerky will look or smell bad when they spoil. In my experience (at my house) mold is the biggest enemy of any jerky or dehydrated meat – fuzzy discolored spots of any color are mold. Fats and olis go rancid from chemical reactions between the fat molecules, air, water, and light (rancidity will occur even if the food is completely sterile). Rancid foods may look fine, but they will smell and taste unpleasant.
How Long Does Homemade Bacon Jerky Last?
Everyone wants a simple shelf life for foods, but when preserving your own foods results will vary depending on storage quality and your environment. Bacon has a LOT of fat, and unlike rendered lard, it’s impractical to get all the moisture out of it. This means it will go rancid faster than leaner dried meats such as beef jerky. Don’t plan on storing bacon jerky long term unless you freeze it.
Now that you know what to look for, here is a rough guide to shelf life for different storage conditions:
- Vacuum seal (or oxygen absorber) + freeze: Years (jerky won’t experience freezer burn)
- Vacuum seal (or oxygen absorber) + refrigerate: Months
- Mylar bag with oxygen absorber + room temp storage: Weeks to potentially a few months under perfect conditions (commercial jerky is packaged this way)
- Vaccum sealed + room temp storage: Up to a few weeks with cool dark conditions
- Freezer bag with air pushed out + room temp storage: Several days to weeks if lucky
Given how easy it is to make bacon jerky, I encourage you to try it at home and experiment with your favorite flavors. It’s becoming difficult to find in grocery stores, so homemade bacon jerky is the way to go. Warning – this stuff is addictive and may become your new favorite snack!
Related Recipes
How to Dehydrate Pasta for Backpacking or Instant Meals
How to Dehydrate Ham & Make Easy Backpacking Meals
If you want more great food for your camping trips, visit our other recipes!

Delicious Bacon Jerky
Equipment
- Food Dehydrator optional (oven or smoker may be used)
Ingredients
- 12 oz Regular cut bacon Thick cut bacon is ok
Optional Seasonings (choose one)
- Coarse ground black pepper adjust amount as desired
- Maple syrup
- Teriyaki sauce
Sweet Smoky Marinade
- ½ cup Cold water
- 1 ½ tbsp Brown sugar
- 1 tsp Liquid smoke
- ⅛ tsp Cayenne pepper optional
Sweet and Spicy Dry Rub
- ⅓ cup Brown sugar
- 1 tsp Garlic powder
- 1 tbsp Chipotle chili powder
Instructions
- For Marinades: If using a marinade, place bacon in a bowl or sealed bag with marinade. Refrigerate for 1-2 hours. Drain and discard liquid before dehydrating bacon
- For Rubs and Dry Seasonings: Coat the bacon with the dry rub or seasoning mix. Refrigerate for 1-2 hours for best flavor.
Dehydrating Instructions
- If using an oven or smoker, preheat to 200°F
- Place raw bacon strips on dehydrator trays (for food dehydrator) or a wire rack over a baking sheet with edges to contain the grease (for oven or smoker).
- If using a food dehydrator, se the temperature to 160°F
Cooking Times and Temperatures
- Cook based on the following times for each temperature depending on the type or cut of bacon you are using. Check the jerky once it reaches the lowest amount of time for your setting.
- Dehydrator – Regular Cut Bacon: 160°F 5-6 hrs
- Dehydrator – Thick Cut Bacon: 160°F 7-8 hrs
- Oven/Smoker – Regular Cut bacon: 200°F 2-3 hrs
- Oven/Smoker – Thick Cut Bacon: 200°F 3-4 hrs
- The bacon jerky is done when the lean meat is dry and chewy. It should break in half rather than bending.